


I have been wanting to learn about Docker for a while now. I am starting a new project and now is the time!
Setting up your VPS server to run Docker with a bunch of containers for your web app can be daunting. In addition to your web app, you have to install your api framework, database, backup service, analytics, server monitoring and reverse proxy your subdomains and renew your ssl certificates. The great thing about docker is you can run all of these services on a cheap VPS without any conflicts between each one. It is easy to recreate the server for a new project or to move your existing project. You can even separate out various services to their own servers as your app grows.
For my new project, I will be using SvelteKit for the first time. However you can easily adapt my starter project to your own needs or framework. You can checkout my Docker VPS Starter on GitHub.
This is a starter project to setup your VPS server to run a SvelteKit app. It also contains everything you need to run your server. A reverse proxy with ssl creation, a database with the Directus api framework for your SvelteKit app which performs daily AWS S3 backups of your database, a realtime server monitor and 2 analytics packages to choose from. Below I will give a brief overview of each package and what it does. Then I will explain a docker-compose.yml file.
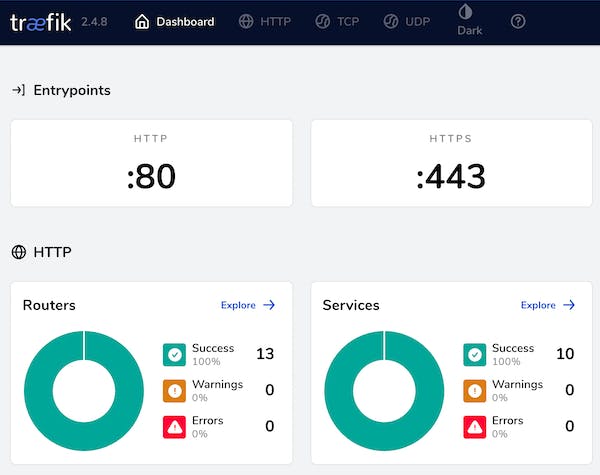
Traefik
Traefik is a reverse proxy that forwards traffic into your docker containers and keeps your ssl certificates updated. It sits in front of your containers and sends a request such as https://plausible.your-domain.com and forwards it into the plausible docker container on your server.
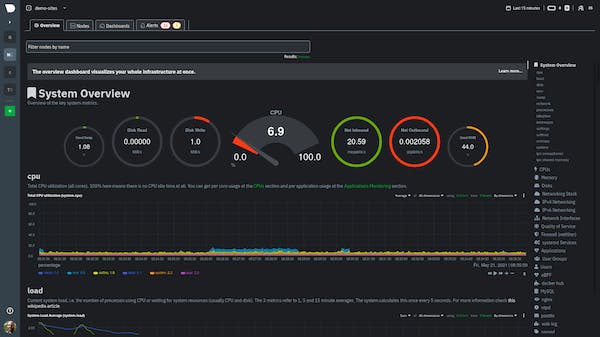
Netdata
Netdata is a realtime server monitor. Easily monitor the load on your server and see when it is time to deploy more resources for your app.
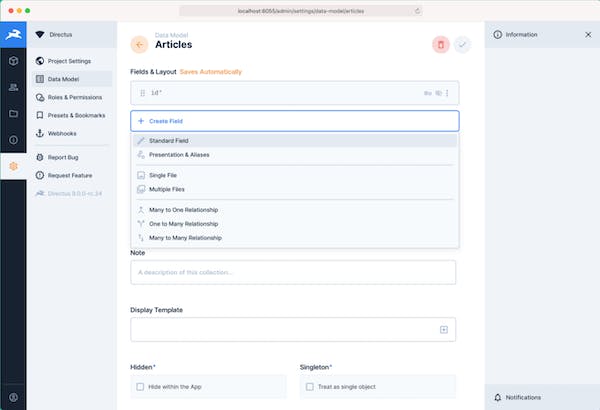
Directus with Postgres Database
Directus creates an app & API for your SQL database. Also I added a postgres backup container that backs up the database daily to an Amazon S3 bucket. Here is a video that explains Directus.
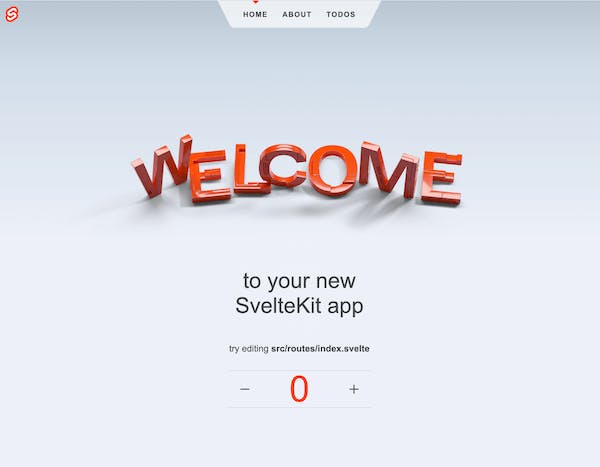
Sveltekit
SvelteKit is a framework for building web applications of all sizes. It is easy to code in and it compiles into plain JavaScript. It is very small compared to React and Vue. Here is a blog post explaining why you might want to use svelte.
Plausible
Plausible is a lightweight and open-source website analytics tool. No cookies and fully compliant with GDPR, CCPA and PECR. The tracking code is less than 1kb. Here are some example stats.

Posthog
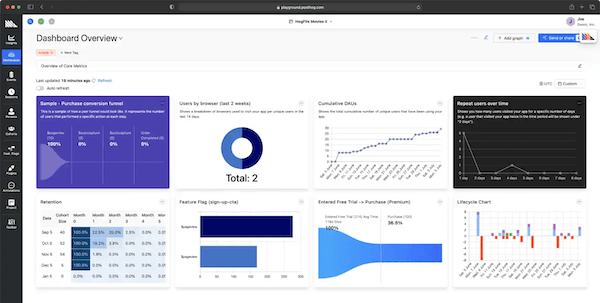
Open source product analytics. Works with your event pipelines and data warehouse. This is for complex analytics analysis. It has heat maps, session replays, funnel tracking etc. Here is a demo video.
When setting up docker containers I prefer to use a docker-compose.yml file to hold all of my container settings. I also use a .env file to hold environmental variables that we don't want to appear in our git repositories. I will explain one of my docker-compose.yml files to show how to set them up in case you want to create your own containers. I will pick the Directus docker-compose file since it has most of the features of the other files.
docker-compose.yml
version: '3'
services:
  database:
    container_name: postgres_${DOCKER_IMAGE_PREFIX}
    image: postgres:14
    restart: always
    volumes:
      - ./database:/var/lib/postgresql/data
    networks:
      - internal_network
    environment:
      POSTGRES_USER: 'directus'
      POSTGRES_PASSWORD: '${PASSWORD}'
      POSTGRES_DB: 'directus'
  # https://github.com/heyman/postgresql-backup
  postgres_backup:
    restart: always
    container_name: postgres_backup
    build: ./postgres_backup
    networks:
      - internal_network
    environment:
      CRON_SCHEDULE: '15 3 * * *' # every day at 3:15am
      DB_HOST: 'database'
      DB_PASS: '${PASSWORD}'
      DB_USER: 'directus'
      DB_NAME: 'directus'
      S3_PATH: '${S3_PATH}'
      AWS_ACCESS_KEY_ID: '${AWS_ACCESS_KEY_ID}'
      AWS_SECRET_ACCESS_KEY: '${AWS_SECRET_ACCESS_KEY}'
      AWS_DEFAULT_REGION: '${AWS_DEFAULT_REGION}'
      MAIL_T0: '${MAIL_TO}'
      MAIL_FROM: '${MAIL_FROM}'
  cache:
    container_name: cache_directus_${DOCKER_IMAGE_PREFIX}
    image: redis:6
    restart: always
    networks:
      - internal_network

  directus:
    container_name: directus_${DOCKER_IMAGE_PREFIX}
    restart: always
    image: directus/directus:latest
    ports:
      - 8055:8055
    labels:
      - "traefik.enable=true"
      - "traefik.http.routers.directus.entrypoints=http"
      - "traefik.http.routers.directus.rule=Host(`${DOMAIN}`)"
      - "traefik.http.middlewares.directus-https-redirect.redirectscheme.scheme=https"
      - "traefik.http.routers.directus.middlewares=directus-https-redirect"
      - "traefik.http.routers.directus-secure.entrypoints=https"
      - "traefik.http.routers.directus-secure.rule=Host(`${DOMAIN}`)"
      - "traefik.http.routers.directus-secure.tls=true"
      - "traefik.http.routers.directus-secure.tls.certresolver=http"
      - "traefik.http.routers.directus-secure.service=directus"
      - "traefik.http.services.directus.loadbalancer.server.port=8055"
      - "traefik.docker.network=traefik_network"
    volumes:
      - ./uploads:/directus/uploads

    networks:
      - internal_network
      - traefik_network
    depends_on:
      - cache
      - database
    environment:
      KEY: '${KEY}'
      SECRET: '${SECRET}'

      DB_CLIENT: 'pg'
      DB_HOST: 'database'
      DB_PORT: '5432'
      DB_DATABASE: 'directus'
      DB_USER: 'directus'
      DB_PASSWORD: '${PASSWORD}'

      CACHE_ENABLED: 'true'
      CACHE_STORE: 'redis'
      CACHE_REDIS: 'redis://cache:6379'

      ADMIN_EMAIL: '${EMAIL}'
      ADMIN_PASSWORD: '${PASSWORD}'

      # Make sure to set this in production
      # (see https://docs.directus.io/reference/environment-variables/#general)
      PUBLIC_URL: 'https://${DOMAIN}'

networks:
  internal_network:
  traefik_network:
    external: true
.env
DOMAIN=directus.yourdomain.com
PASSWORD=yourpassword
# Generate a random key https://randomkeygen.com or make your own
KEY=CHANGE_THIS_your_random_key
SECRET=CHANGE_THIS_your_random_secret
EMAIL=your_email@your_domain.com
DOCKER_IMAGE_PREFIX=yourdomain #or whatever you want to call your docker image
# necessary for the postgres_backup
S3_PATH=s3://bucket-name/some/path
AWS_ACCESS_KEY_ID=your_aws_key_id
AWS_SECRET_ACCESS_KEY=your_aws_secret_accress_key
AWS_DEFAULT_REGION=your_aws_default_region
MAIL_TO=your_email@your_domain.com
MAIL_FROM=your_email@your_domain.com
version: 3is the version of this file. Currently docker-compose is version 3.9. Some commands don't exist in lower versions. So if you get a weird error you can try updating to the latest version.services:These are the docker containers we will run. In this file I have (database, postgres_backup, cache and directus). The services you can name anything you want. This is how you will access one container from another. So if your webapp wanted to call your database it would usedatabaseservice name as the DB_HOST environmental variable.container_name:this is the name you will use when you run docker commands from the command line.image:This is the container you are requesting that is hosted and maintained remotely. The other option isbuild: ./local_directory_of_docker_container_with_a_Dockerfile. This will build a docker container from files you created locally instead of a prebuilt image.restart: always. This tells the docker image to restart the docker image if there is any sort of failure or reboot of the server.volumes: - ./database:/var/lib/postgresql/dataThis tells docker to setup a/databasefolder locally that will save the postgres databases which are stored inside of the container at:/var/lib/postgresql/datanetworks: - internal_networkThis is the network that our docker container uses to communicate between each of our service containers. This network is not accessible outside of these containers. If you want be able to access outside of your docker containers you need to create an external network which I will explain how to do shortly. You can have multiple networks in your docker-compose.yml. The reason to use internal networks when possible is it is more secure. For instance your web app may need to talk to your database and the outside world, but your database doesn't need to be exposed to anything but your web app so it only needs to be on the internal_network. Also you can name your networks anything, just like your services.environment:. These are variables you want to set inside of your container. For instance we need to set three variables inside of our postgres database.environment: POSTGRES_USER: 'directus' POSTGRES_PASSWORD: '${PASSWORD}' POSTGRES_DB: 'directus'You may have noticed the password we are setting
${PASSWORD}This is a special variable that we identify in our .env file. As long as you keep the name.env. docker-compose will automatically look for that file and substitute your variables in that file for their placeholders in the docker-compose file.ports:This left side is the external and the right is the internal port. So your internal port is usually the default service port for that service. This can be very useful if we have a few services on the same port. Then we can change our default port on the external side to something else and we will not have any collisions between ports.ports: - 8055:8055labels:You can use labels for several things but we are only using it to tell Traefik which is our network reverse proxy what to do. We use these lines to tell Traefik about the rules it will use to direct traffic to our container. Let's go through the lines.
This just tells Traefik we will use its services.
- "traefik.enable=true"
These next three lines tell Traefik to look at our directus.yourdomain.com. If it gets any traffic on this unsecured link to redirect it to our secure https:// link.
      - "traefik.http.routers.directus.rule=Host(`${DOMAIN}`)"
      - "traefik.http.middlewares.directus-https-redirect.redirectscheme.scheme=https"
      - "traefik.http.routers.directus.middlewares=directus-https-redirect"
These two lines tell Traefik to take any traffic to directus.yourdomain.com and forward it into our container.
      - "traefik.http.routers.directus-secure.entrypoints=https"
      - "traefik.http.routers.directus-secure.rule=Host(`${DOMAIN}`)"
This tells Traefik to setup our ssl certificate and renew it. It uses Let's Encrypt to get us a free ssl certificate.
- "traefik.http.routers.directus-secure.tls.certresolver=http"
These line tell Traefik where to look for our service. Our service name is directus and we reside at the internal network port of 8055. (NOTE: it is looking for the internal network port and NOT the external network port.). I made that mistake and it took forever to find my problem.
- "traefik.http.routers.directus-secure.service=directus"
      - "traefik.http.services.directus.loadbalancer.server.port=8055"
Finally we are telling Traefik to use the traefik_network which is the external network we setup. Directus has also been placed on this network and the two services can communicate with each other since they are on completely different docker-compose files.
- "traefik.docker.network=traefik_network"
depends_on:. This just tells our directus service that it needs the cache and database services to function.depends_on: - cache - databasenetworks:This sets up our networks on these services. We have two: Ourinternal_networkand ourtraefik_networkwhich is external. We also need to create our external network before we load our docker-compose file. We do this with the command:docker network create traefik_networkfrom the command line.networks: internal_network: traefik_network: external: true
Finally we can run our finished docker file with: docker-compose build and then docker-compose up -d. If you only have image files and nothing to build locally you can skip the first command. Running both will not hurt anything though. To shutdown your docker containers run: docker-compose down. In my next post, I will try to provide some tips for how to debug your docker-compose file when something goes wrong.
Well I hope this helps you with docker. Check out my Docker VPS starter which is already setup for the services above. Just follow the directions to set it up for your own project. A special thanks to all of the open source projects above that provide so much value! Hopefully you can support them in some way!